
Authentic Italian Breakfast Recipes: The Homemade Brioche Every Pasticceria Swears By la vera colazione
A soft, layered Italian brioche built the way pasticcerie actually make it — slow-proofed, laminated with butter, and filled with jam, chocolate, or pastry cream.

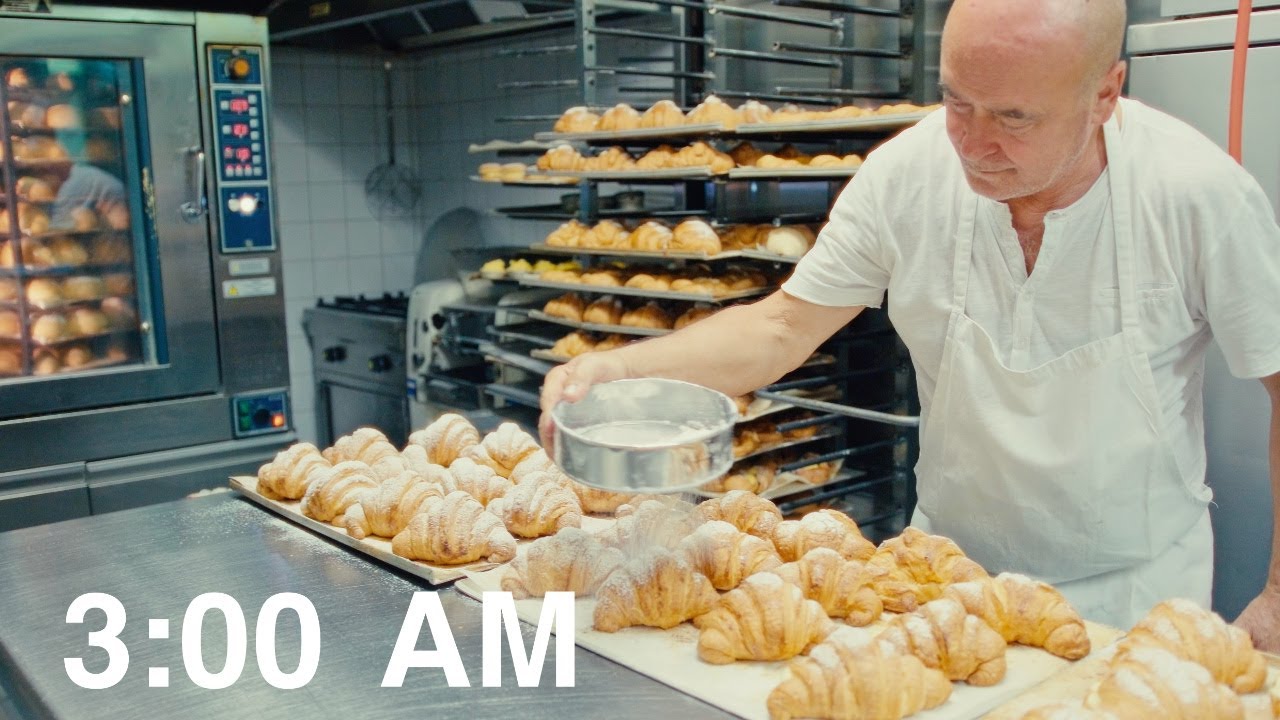
Ask most people what Italians eat for breakfast and you’ll get the same two answers: cappuccino and a brioche. That’s not wrong, exactly — it’s just incomplete. A true search for authentic Italian breakfast recipes leads somewhere more specific: a soft, faintly sweet, buttery pastry with visible layers, filled with jam or pastry cream, eaten standing at a counter with a coffee that’s stronger than drip but gentler than a straight shot of espresso.
That pastry is a brioche — and in Italy, it’s not the same thing as a French croissant, even though the two get mixed up constantly outside the country. Italian brioche is softer, richer, and less crisp, made from a laminated dough that’s closer to a sweet enriched bread than a flaky croissant. This breakfast tradition sits alongside other Italian morning staples — a quick espresso, a moka pot at home, or eggs when the morning calls for something more substantial, the way you’d find in an italian frittata recipe with eggs.
People search for this recipe for a few reasons: they’ve had a real Italian brioche on vacation and can’t find anything close to it at home, they’re building an italian breakfast buffet for a brunch or holiday, or they’re simply curious how a pastry that looks so delicate is actually put together. Whatever brought you here, this is a full, ingredient-by-ingredient walkthrough of how to make it — dough, lamination, shaping, and baking — using the technique real pasticcerie rely on, scaled down for a home kitchen.
Why This Recipe Works
The defining trait of a good Italian brioche isn’t sweetness — it’s texture. You want visible layers when you tear it open, a crumb that’s soft rather than airy, and a crust with a little give instead of a hard crack. That combination only happens because of two separate processes working together: fermentation and lamination.
Fermentation is what gives the dough its flavor and its light, pillowy texture. A long, cool rise (rather than a fast, warm one) lets the yeast develop flavor slowly instead of just pumping out gas quickly. That’s why professional bakers let this dough rest for hours, often overnight, before shaping and baking it fresh. Lamination — folding cold butter into the dough in stages — is what creates the layers. Each fold traps a thin sheet of butter between two sheets of dough, and when the brioche bakes, that butter melts and releases steam, pushing the layers apart just slightly. The result is a pastry that’s rich without being heavy.
Skipping either step gets you close, but not quite there. A brioche made with quick fermentation and no lamination will taste fine but come out dense and uniform. This recipe keeps both steps intact, just simplified for a home kitchen and a stand mixer instead of a bakery’s dough sheeter.
The layers aren’t decoration — they’re proof the butter had somewhere to go.
Tips Before You Start
A few things make a real difference with laminated dough, and they’re easy to miss the first time around.
Keep the butter cold, but not hard. If the lamination butter is too cold, it cracks and tears through the dough instead of folding smoothly. If it’s too warm, it soaks in and you lose the layers entirely. You’re looking for butter that bends like a stick of chilled clay — cool but pliable.
Don’t rush the chilling between folds. Every time the recipe tells you to chill the dough, that rest lets the gluten relax and the butter firm back up. Skipping it makes the next fold harder to do cleanly and can cause butter to squeeze out the sides.
Finally, weigh your ingredients if you can. Butter lamination is sensitive to ratios, and cup measurements for flour can vary by as much as 20% depending on how it’s scooped. A kitchen scale removes that guesswork entirely.
Quick Recipe Information
Total time has a wide range because this dough can be shaped and baked the same day (about 5 hours, mostly hands-off) or chilled overnight and baked fresh the next morning, which is closer to how pasticcerie do it.
Ingredients
- 500g (4 cups) all-purpose flour (the backbone of the dough; bread flour works too and gives slightly more chew)
- 70g (⅓ cup) granulated sugar (a modest amount — this dough is meant to be lightly sweet, not cake-like)
- 8g (2 tsp) fine salt (balances the sugar and strengthens the gluten structure)
- 3 large egg yolks (adds richness and a tender crumb; save the whites for the egg wash or another recipe)
- 10g (2¼ tsp) active dry yeast (instant yeast works too — skip the proofing step and mix it straight into the flour)
- 220ml (scant 1 cup) whole milk, lukewarm (activates the yeast and hydrates the dough; low-fat milk works but the crumb will be slightly less rich)
- 100g (7 tbsp) unsalted butter, softened (mixed into the dough itself for tenderness)
- 150g (⅔ cup) unsalted butter, cold (this is the lamination butter — it must stay cold until folded in)
- 1 tsp vanilla extract or the zest of 1 orange (the “aromas” traditional recipes call for — either works, or use both)
- 1 egg + 1 tbsp milk, whisked (egg wash for a shiny, golden crust)
- ~180g (¾ cup) apricot jam, pastry cream, or chocolate-hazelnut spread (filling — use one or mix and match; jam is the most traditional)
This recipe naturally leans in the same direction as other Mediterranean breakfast recipes in that it rewards good, simple ingredients over anything fussy.
Equipment Needed
- Stand mixer with dough hook (or a large bowl and clean hands)
- Rolling pin
- Bench scraper
- Plastic wrap or a large reusable bag for chilling the dough
- Sharp knife or pizza cutter, for portioning
- Baking sheets lined with parchment paper
- Pastry brush, for the egg wash
- Piping bag (optional, for filling after baking)
Step-by-Step Instructions
- Make the dough. In a stand mixer bowl, combine the flour, sugar, and salt. In a separate bowl, whisk the lukewarm milk with the yeast and let it sit for 5–10 minutes until foamy (skip this if using instant yeast). Add the milk mixture, egg yolks, and vanilla or orange zest to the flour. Mix with the dough hook on low for 3–4 minutes, then add the softened 100g of butter in two additions, mixing until fully absorbed. Knead for another 8–10 minutes until the dough is smooth, elastic, and pulls slightly away from the bowl.
- First rise. Shape the dough into a ball, place it in a lightly oiled bowl, and cover. Let it rise at room temperature for 1 to 1.5 hours, until roughly doubled. Then flatten it gently, wrap it, and refrigerate for at least 1 hour (or overnight) — this firms the dough so it’s easier to laminate.
- Prepare the lamination butter. Place the 150g of cold butter between two sheets of parchment paper and pound and roll it into a flat rectangle, roughly 6×8 inches. It should be pliable but still cold. Return it to the fridge until you’re ready to use it.
- Laminate the dough. On a lightly floured surface, roll the chilled dough into a rectangle about twice the size of your butter block. Place the butter in the center and fold the dough over it from both sides, like closing a book, fully enclosing the butter. Roll this out into a long rectangle, then fold it in thirds (a “letter fold”). Wrap and chill for 30 minutes. Repeat this roll-and-fold process two more times, chilling for 30 minutes between each fold — three folds total. This is what builds the layers.
- Shape the brioche. After the final fold and chill, roll the dough into a large rectangle about ¼ inch thick. For classic cornetti (crescent shape), cut the dough into triangles and roll each one from the wide base to the point, curving the ends slightly. For round or horseshoe-shaped brioche, cut strips instead and coil or curve them as you like — the shape is really a matter of preference.
- Final proof. Arrange the shaped brioche on parchment-lined baking sheets, spaced well apart. Cover loosely and let them proof at room temperature for 1.5 to 2 hours, until visibly puffy and light when you nudge the tray. They won’t fully double, but they should look noticeably relaxed and airy compared to when you shaped them.
- Egg wash and bake. Preheat the oven to 180°C (350°F). Brush each brioche gently with the egg wash, avoiding heavy pooling in the folds. Bake for 16–20 minutes, until deep golden brown and the layers are visible on the surface. Rotate the tray halfway through for even color.
- Cool and fill. Let the brioche cool on a wire rack for at least 15 minutes before filling — filling them hot will melt jam into a puddle and make pastry cream weep. Once cool, use a piping bag fitted with a small tip to insert jam, pastry cream, or chocolate spread into the center or a slit cut into the side.
Authentic Italian Brioche (Cornetti)
Soft, laminated Italian breakfast brioche, filled with jam, chocolate, or pastry cream.
Ingredients
- 500g all-purpose flour
- 70g granulated sugar
- 8g fine salt
- 3 large egg yolks
- 10g active dry yeast
- 220ml lukewarm whole milk
- 100g unsalted butter, softened
- 150g unsalted butter, cold (lamination)
- 1 tsp vanilla or 1 orange, zested
- 1 egg + 1 tbsp milk (egg wash)
- 180g jam, pastry cream, or chocolate spread
Instructions
- Mix and knead the enriched dough; let rise 1–1.5 hrs, then chill 1 hr+.
- Flatten cold butter into a rectangle; keep chilled.
- Laminate: enclose butter in dough, then roll and fold 3 times, chilling 30 min between folds.
- Roll dough ¼ inch thick; cut and shape into cornetti or your preferred brioche shape.
- Proof shaped brioche 1.5–2 hrs until puffy.
- Egg wash and bake at 180°C (350°F) for 16–20 minutes until golden.
- Cool 15 minutes, then fill with jam, pastry cream, or chocolate.
Chef’s Tips
- Use a thermometer if the folds feel messy. Butter that’s around 14–16°C (57–61°F) is ideal for lamination — cold enough to hold shape, soft enough to bend without cracking.
- Freeze shaped, unbaked brioche. Once shaped, you can freeze them on a tray, then transfer to a bag once solid. Thaw overnight in the fridge and proof at room temperature before baking — this mirrors how the dough is handled commercially, where shaped pieces go straight into a shock freezer.
- Don’t over-flour the work surface. Excess flour worked into the dough during rolling toughens the crumb. Use just enough to prevent sticking, and brush off any excess before folding.
- Test doneness by color, not just time. Ovens vary. Look for a deep amber-gold color and layers that have visibly separated at the surface before pulling them out.
- Fill after baking, not before. Filling before baking can cause leaking and uneven baking. Piping the filling in after cooling gives a cleaner result and lets you customize each one.
Common Mistakes
- Butter melting into the dough during lamination. This happens when the kitchen is warm or you work too slowly. Fix it by chilling the dough for an extra 15–20 minutes anytime it starts feeling soft or sticky, and work in a cool room if possible.
- Dense, bread-like texture instead of soft layers. Usually caused by skipping chill time between folds or under-proofing before baking. Give the dough the full rest times listed, even if it seems slow.
- Brioche that spreads flat instead of holding its shape. This is typically over-proofing — the gluten structure has weakened too much to hold the shape once it hits the oven. Watch for “puffy but still slightly springy,” not doubled and jiggly.
- Pale, soft crust. Usually an underbaked brioche or an egg wash applied too thin. Brush a second light coat of egg wash before baking, and don’t pull the tray until the color is a deep gold, not blonde.
- Filling leaks out during baking. This happens when jam or cream is added before baking. Always fill after the brioche has cooled, using a piping tip inserted into a small slit or the center.
Recipe Variations
Vegetarian
This recipe is already vegetarian as written — no substitutions needed.
Gluten-Free
Substitute a 1:1 gluten-free flour blend with xanthan gum. Lamination is harder to control with gluten-free dough, so expect fewer, thicker layers. [VERIFY] exact hydration adjustment for your specific blend.
Spicy
Not a natural fit for a sweet breakfast pastry — Italian brioche traditionally stays sweet. Skip this variation unless you’re experimenting with a savory version.
Dairy-Free
Swap the milk for a plant-based alternative and use a high-quality dairy-free butter block for both the dough and lamination. Vegan butter can be softer, so chill it slightly longer before folding.
Low-Carb
Laminated yeasted dough doesn’t adapt well to low-carb flours, since the structure depends on gluten development. This one is best enjoyed as-is in moderation rather than reformulated.
Kid-Friendly
Fill with chocolate-hazelnut spread instead of jam, and shape into simple rounds instead of curved cornetti — easier for small hands to eat and less messy.
Savory “Salato” Version
Reduce the sugar to 20g, skip the vanilla, and fill baked brioche with prosciutto and a thin layer of soft cheese instead of jam — a version some Italian bars offer alongside the sweet ones.
Storage & Reheating
Refrigeration: Baked and cooled brioche keep in an airtight container at room temperature for up to 2 days. Refrigeration isn’t recommended once baked — it speeds up staling.
Freezing: Baked brioche freeze well for up to 2 months in a freezer-safe bag. You can also freeze the dough at the shaped, unbaked stage (see the Chef’s Tips section above), which gives a fresher result.
Reheating: Warm baked brioche in a 150°C (300°F) oven for 5–7 minutes to refresh the crust without drying out the inside. A microwave works in a pinch but softens the layers.
Shelf life: Best within 24 hours of baking. By day 2, the texture is still good but noticeably softer at the edges.
Meal prep tip: Bake a full batch on the weekend, freeze what you won’t eat within two days, and pull pieces out the night before to thaw at room temperature — a practical option if you’re prepping breakfasts ahead, similar in spirit to batch-cooked grab-and-go breakfasts.
Serving Suggestions
A moka pot coffee or cappuccino: The classic pairing for a reason — a stronger, slightly bitter coffee balances the brioche’s sweetness instead of competing with it.
Fresh-squeezed orange juice (spremuta): The acidity cuts through the butter and refreshes the palate between bites, especially with a jam-filled brioche.
A small bowl of fresh fruit: Berries or sliced stone fruit add a light, unsweetened contrast next to a rich pastry.
As part of an Italian breakfast buffet: Set these out alongside fette biscottate, cured meats, and a cheese plate for a spread that covers both sweet and savory — a good option if you’re hosting brunch.
Warm milk with a splash of coffee (latte macchiato): A gentler, kid-friendly pairing that still nods to Italian tradition.
Nutrition Information
Calculated per serving (1 of 12 brioche) from the exact ingredients and quantities above, using standard USDA reference values.
These figures will shift depending on the filling you choose — apricot jam, pastry cream, and chocolate-hazelnut spread all carry different amounts of sugar and fat, so treat the sugar and fat figures above as a mid-range estimate rather than fixed numbers. Values are estimates only and will vary based on the specific brands of flour, butter, and filling used.
Frequently Asked Questions
- Is Italian brioche the same as a croissant?
No. Both are laminated, but Italian brioche uses an enriched dough with egg yolks and more sugar, giving it a softer, sweeter, less crisp texture than a French croissant, which relies on a leaner dough for a crackly, flaky bite.
- Can I make this without laminating the dough?
You can mix all the butter directly into the dough instead of laminating, and you’ll still get a soft, tasty brioche — you’ll just lose the visible layers and the slightly lighter texture that lamination creates.
- Why does the dough need to be chilled between folds?
Chilling firms the butter back up and relaxes the gluten, which makes the next fold easier to do cleanly without the butter tearing through or the dough springing back.
- Can I use instant yeast instead of active dry yeast?
Yes. Mix instant yeast directly into the flour instead of blooming it in milk first, and use the same quantity called for in the recipe.
- What’s the best filling for an authentic result?
Apricot jam is the most traditional, followed closely by pastry cream and chocolate. Most Italian bars and pasticcerie offer all three, plus a plain, unfilled version.
- Can I prep the dough the night before?
Yes — this is actually closer to how it’s done professionally. Shape the brioche, refrigerate overnight, then let them come to room temperature and finish proofing before baking fresh in the morning.
- Why is my brioche dense instead of layered?
This usually points to rushed chilling between folds, butter that melted into the dough, or under-proofing before baking. Give each rest period the full time listed.
- Do I need a stand mixer?
No — you can knead this by hand. It takes longer, roughly 12–15 minutes, and the dough will feel sticky at first before it comes together.
- What’s the difference between a “caffè macchiato” and a “cappuccino” to drink alongside this?
A caffè macchiato is an espresso shot with a small amount of milk and foam, while a cappuccino has significantly more steamed milk and foam — a fuller, creamier cup.
- Can I freeze the dough before shaping?
It’s best to freeze it after shaping rather than before — the dough handles the freeze-thaw cycle better once it’s already in its final form, and it proofs more evenly after thawing.
- Is this recipe similar to an Italian muffuletta sandwich recipe?
Not really — a muffuletta is a savory, layered sandwich built on a round bread loaf, usually served for lunch, while this brioche is a sweet, laminated breakfast pastry. They share Italian roots but serve very different purposes.
- Can I make mini versions for a crowd?
Yes — cut smaller triangles or strips for bite-sized brioche, and reduce the bake time by 3–5 minutes, watching closely for color since smaller pieces brown faster.
Authentic Italian Breakfast Recipes Worth Repeating
What makes this brioche worth the time isn’t just the flavor — it’s understanding why each step exists. The long fermentation builds flavor a fast rise can’t replicate, and the lamination gives you the soft, distinct layers that separate an actual Italian brioche from a plain sweet roll. Once you’ve made it once, the process gets more intuitive each time.
If you’re building out a full italian breakfast recipe post or planning an italian breakfast buffet for guests, this brioche pairs naturally with a moka pot coffee, fresh juice, and something savory on the side — an Italian frittata or a simple platter of cheese and cured meat rounds out the spread well.
Save this one if you’re planning to make it again, since it’s the kind of recipe that gets easier — and better — with a little repetition.
Watch the Full Process
For a look at how these are made in an actual Italian pasticceria overnight, watch the video below.
Authentic Italian Breakfast Recipes: The Homemade Brioche Every Pasticceria Swears
Ingredients
- 500 g (4 cups) all-purpose flour (the backbone of the dough; bread flour works too and gives slightly more chew)
- 70 g (⅓ cup) granulated sugar (a modest amount — this dough is meant to be lightly sweet, not cake-like)
- 8 g (2 tsp) fine salt (balances the sugar and strengthens the gluten structure)
- 3 large egg yolks (adds richness and a tender crumb; save the whites for the egg wash or another recipe)
- 10 g (2¼ tsp) active dry yeast (instant yeast works too — skip the proofing step and mix it straight into the flour)
- 220 ml (scant 1 cup) whole milk, lukewarm (activates the yeast and hydrates the dough; low-fat milk works but the crumb will be slightly less rich)
- 100 g (7 tbsp) unsalted butter, softened (mixed into the dough itself for tenderness)
- 150 g (⅔ cup) unsalted butter, cold (this is the lamination butter — it must stay cold until folded in)
- 1 tsp vanilla extract or the zest of 1 orange (the "aromas" traditional recipes call for — either works, or use both)
- 1 egg + 1 tbsp milk, whisked (egg wash for a shiny, golden crust)
- ~180g (¾ cup) apricot jam, pastry cream, or chocolate-hazelnut spread (filling — use one or mix and match; jam is the most traditional)
Instructions
- 500g (4 cups) all-purpose flour (the backbone of the dough; bread flour works too and gives slightly more chew)
- 70g (⅓ cup) granulated sugar (a modest amount — this dough is meant to be lightly sweet, not cake-like)
- 8g (2 tsp) fine salt (balances the sugar and strengthens the gluten structure)
- 3 large egg yolks (adds richness and a tender crumb; save the whites for the egg wash or another recipe)
- 10g (2¼ tsp) active dry yeast (instant yeast works too — skip the proofing step and mix it straight into the flour)
- 220ml (scant 1 cup) whole milk, lukewarm (activates the yeast and hydrates the dough; low-fat milk works but the crumb will be slightly less rich)
- 100g (7 tbsp) unsalted butter, softened (mixed into the dough itself for tenderness)
- 150g (⅔ cup) unsalted butter, cold (this is the lamination butter — it must stay cold until folded in)
- 1 tsp vanilla extract or the zest of 1 orange (the "aromas" traditional recipes call for — either works, or use both)
- 1 egg + 1 tbsp milk, whisked (egg wash for a shiny, golden crust)
- ~180g (¾ cup) apricot jam, pastry cream, or chocolate-hazelnut spread (filling — use one or mix and match; jam is the most traditional)